


Our newborn had all three oral ties. Here’s why we moved forward, what it was like, and how it changed everything.
Our First Clue Something Was Off
What Is a Tongue, Lip, or Cheek Tie?
What the Procedure Was Actually Like
How Much Does a Frenectomy Cost?
Post-Procedure Care & Oral Exercises
Download: Does Your Baby Have an Oral Tie?
Our First Clue Something Was Off
The first day we got home from the hospital, I was crying on the phone with a lactation consultant (LC). Not the gentle, emotional tears — the full, overwhelmed, everything-is-going-wrong kind.
Breastfeeding wasn’t just hard, it felt impossible. My baby was popping on and off the nipple over 30 times per feed. Each session took 45 minutes to an hour, and by the end, we were both frustrated and exhausted. Everyone warned me breastfeeding would be hard. Being a first time Mom, I told myself I just needed to try harder, but my gut was telling me something was off.
We saw the LC the next day and started working on latch techniques. Things improved a little. But during one visit, she gently mentioned something: she suspected our baby had a posterior tongue tie and upper lip tie.
I was shocked. The lactation consultant at the hospital had said there was nothing. Our pediatrician didn’t mention anything either.
What Is a Tongue, Lip, or Cheek Tie?
If you’re in the thick of feeding challenges like painful latch, clicking, gas, popping off the nipple, or reflux-y symptomsm you’ll likely have stumbled into the world of oral ties. And that’s probably why you’re reading this.
Here’s the short version:
- A tongue tie happens when the frenulum (that little string of tissue under the tongue) is too tight or short, limiting mobility.
- A lip tie restricts how the upper lip lifts and flanges during feeding.
- A cheek tie involves the inner cheek being tethered to the gums— and yes, it’s a thing. (Surprise: our baby had all three.)
Oral ties can make feeding inefficient and frustrating. Not just for baby, but for you too. They’ve been linked to poor latch, low milk transfer, nipple pain, blisters, gassiness, and more.
But the topic is controversial.
Some pediatricians dismiss ties unless weight gain is impacted. (This was our case) Others– like LCs, pediatric dentists, and feeding therapists– argue they’re underdiagnosed and can affect feeding, speech, oral development, and even breathing patterns later in life.
The result? A lot of confused parents stuck in the middle, trying to figure out if this is real… or just another thing to worry about.
In our case, it was real. And getting answers, and a plan, made all the difference.
Why We Chose to Move Forward
After five weeks of trying everything — different holds, nipple shields, pace feeding, pumping — nursing was still painful. It was frustrating and confusing. I kept wondering: Is this just how it’s supposed to be? Or is something actually wrong?
Our LC took detailed photos of his mouth and showed us the restrictions. She gently suggested it might be time to consider a frenectomy.
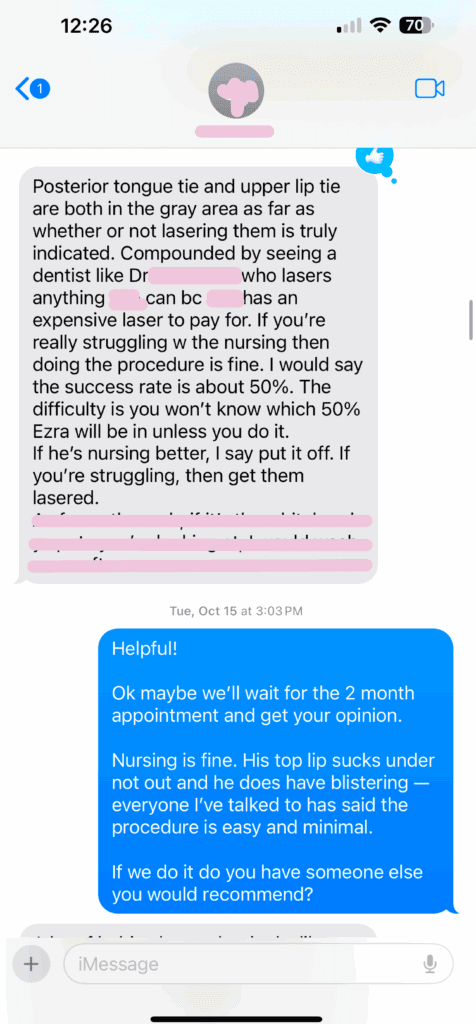
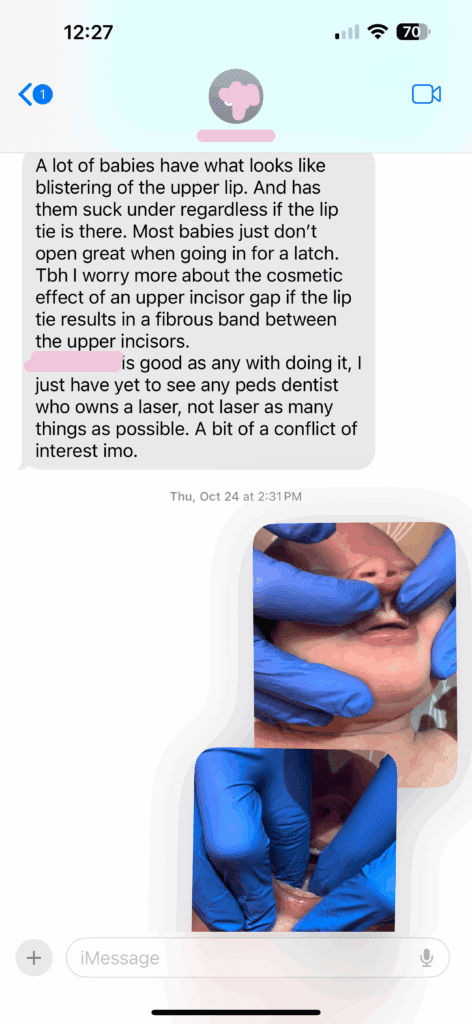
I texted our pediatrician, who I really respect and trust. He said he wasn’t a big believer in the overall outcomes of the procedure and mentioned that the lip tie might be worth correcting, but mostly for cosmetic reasons.
(FYI: a lip tie can sometimes cause a gap between baby teeth — called a diastema.)
It left us feeling torn.
I didn’t want to put our baby through something unnecessary. Especially when we were hearing things like “50% success rate.”
But our LC referred us to a pediatric dentist who specializes in oral ties. They had us fill out a symptom checklist, and we checked almost every single box. It was validating. I remember thinking, I wish I had seen this sooner. It confirmed what I had been feeling for weeks but couldn’t quite articulate.
Prepping for the Procedure
We still hesitated. No one wants to jump into a procedure for their newborn.
But our LC gave us a helpful approach. She recommended we wait a few days and begin gentle oral exercises to prep his mouth. She explained— and to be clear, this is just her opinion, not medical advice— that many “failed” frenectomies don’t fail because of the procedure itself. They fail because the baby’s oral muscles aren’t ready to adapt afterward.
So we gave it a few days. We did the exercises.
And when we went in, we felt ready.
What the Procedure Was Actually Like
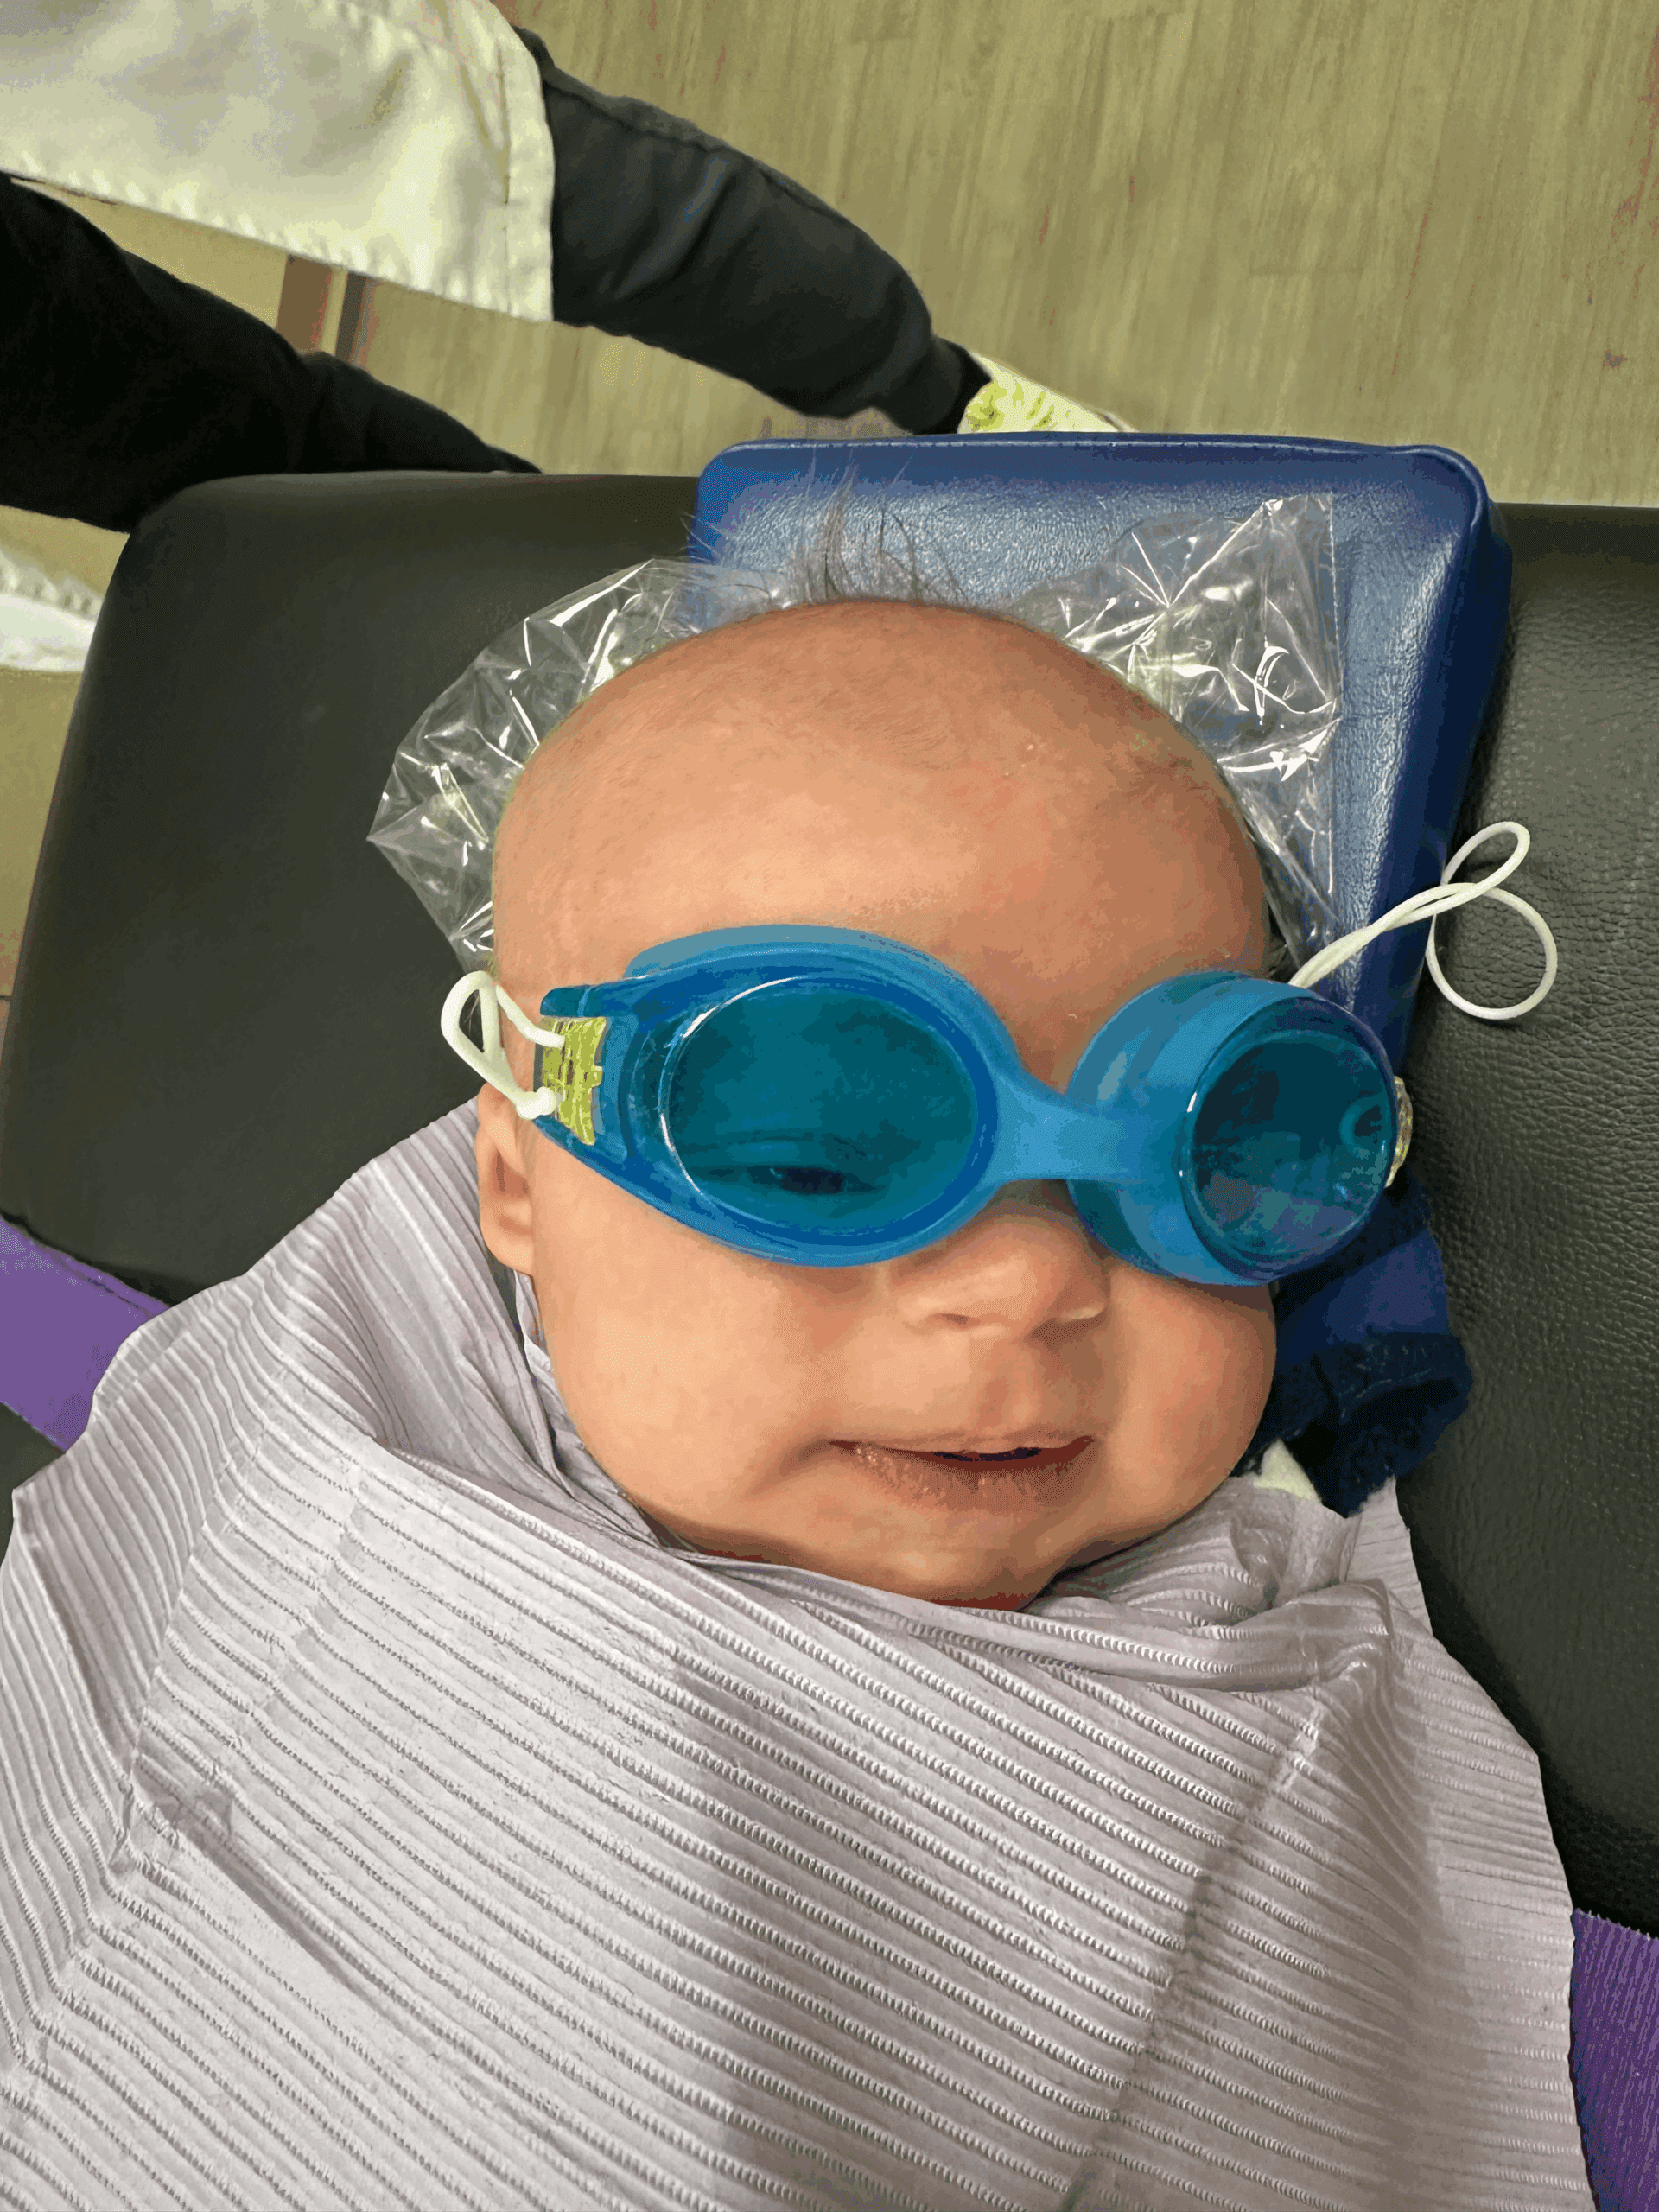
Our baby was just under six weeks old. We had the procedure done at a pediatric dental office using a CO₂ laser. They let us go into the room with him, which I hadn’t expected, but I was so glad we could be there.
The laser zaps were just a few seconds long per tie.
He was swaddled and calm going in. He cried of course, but it wasn’t the panicked scream I had imagined. Honestly, his vaccine cries were worse. This was more of a startled, complain-y cry. And I think he was more upset about being swaddled than getting the actual procedure.
But, he did get to wear some really cute goggles. You’re welcome internet.

The dentist explained that babies don’t yet have fully developed nerve endings in that area. So while they do feel it, it’s more like pins and needles than true pain.
The Type of Laser Matters
Not all frenectomies are the same. Our provider used a CO₂ laser, which delivers energy in a way that minimizes bleeding, reduces the chance of scar tissue, and heals quickly.
Other tools like diode lasers or scissors are still used, but have more risks. Diode lasers can cause deeper burns and more scar tissue. Scissors tend to cause more bleeding and trauma to the tissue.
What mattered most to me was the experience of the provider behind the tool and reviews from other patients. As always, ask questions and don’t be afraid to get a second opinion.
Cost
How Much Does a Frenectomy Cost?
Let’s talk numbers. Because for most parents, cost is part of the decision.
We paid $200 out-of-pocket for our baby’s frenectomy. That included the evaluation, the release of all three ties (tongue, lip, and cheek), and a post-op check-in. The procedure was done at a pediatric dental office that specializes in oral restrictions and uses a CO₂ laser, which is often considered the most precise and gentle method. The actual cost of the procedure was just over $1000.
According to estimates, the average cost of a frenectomy ranges from $250 to $1,200. In some cases, the cost may be higher or lower depending on specific factors like age, method, or location.
Does insurance cover it?
Sometimes, but not always. Ours did.
Many pediatric dentists are out-of-network, and some don’t bill insurance directly. In our case, we were given a superbill to submit for potential reimbursement, but we were advised up front to expect to pay out-of-pocket.
If you’re looking into this, here’s what I’d recommend:
- Call your insurance company ahead of time and ask if they cover frenectomies under medical or dental.
- Ask the provider if they offer any payment plans or sliding scale options.
- Compare types of providers: ENT specialists and some in-network pediatricians may offer lower-cost or insurance-covered options, but they may not use lasers or offer the same level of aftercare.
Is it worth it?
For us — yes. Without question.
It wasn’t a small expense, but it completely transformed our feeding experience, reduced my pain, and gave us peace of mind. You can’t really put a price on that.
The Results Were Immediate
I nursed him immediately after the procedure, right there in the office.
And for the first time, everything changed.
He latched deeply. He stayed on. I didn’t wince. He didn’t pop off.
It was the first time feeding felt… natural.
What Post-Procedure Care Looked Like
The next few weeks were all about healing and stretching consistency.
We gave baby Tylenol for two days to manage discomfort, and we followed a strict oral stretching routine. I share visuals of the stretches here. These were done multiple times a day and included:
- Lip stretch: Lifting the upper lip to prevent reattachment
- Tongue stretch: The hardest — pushing the tongue up and back to open the diamond-shaped incision
- Cheek stretches: The easiest of the three
- Plus 3–4 more functional movement exercises to build oral strength
It wasn’t fun. But it was worth it.
Post-Frenectomy Stretches: What We Did (And What No One Warns You About)
The procedure itself was quick. The real work came afterward.
We were instructed to do oral stretches multiple times per day for several weeks to prevent reattachment and help baby learn to use his newly freed oral muscles. I won’t sugarcoat it — this was the most emotionally draining part of the whole experience.
Some stretches were simple. Others felt impossible at first. But every provider we spoke to emphasized how essential they were for long-term success.
A few notes from our dentist
These might be different than yours, so use the advice of your medical professional:
- Do not be afraid, you cannot over stretch the lip, cheek or the tongue. The lifts are the sorest the week following the procedure.
- Lift the lip, tongue and/or cheek until fully moved free from the wound for 5 seconds. Do this at least 3 times a day, every 8 hours, for at least 4 weeks.
- Trim nails as fingernails should NOT touch the wound.
- Use Smart Phone Alerts to make sure lifts are occurring once every 8 hours.
- Start 8 hours after the release for all lip and cheek ties.
- Wait 24 hours after the release to start the tongue lift.
- Elevations or lifts of the wounds can be done prior to feeding for infants but not less than once every 8 hours.
Here’s what we did:
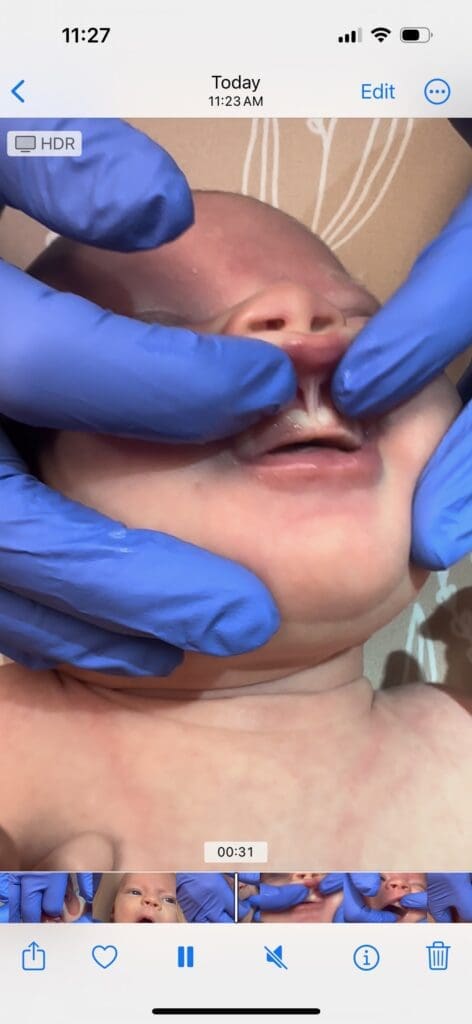
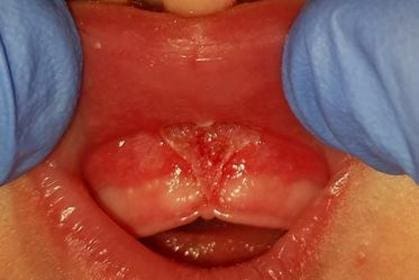
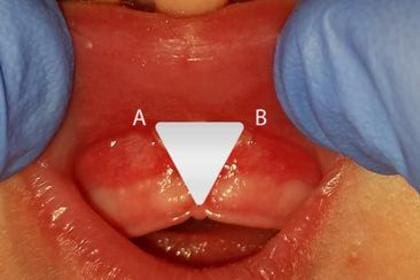
1. Upper Lip Stretch
We gently lifted the top lip and held it upward for a few seconds. Look for the triangle.
It wasn’t painful for him, more annoying. But it helped keep the incision open as it healed.
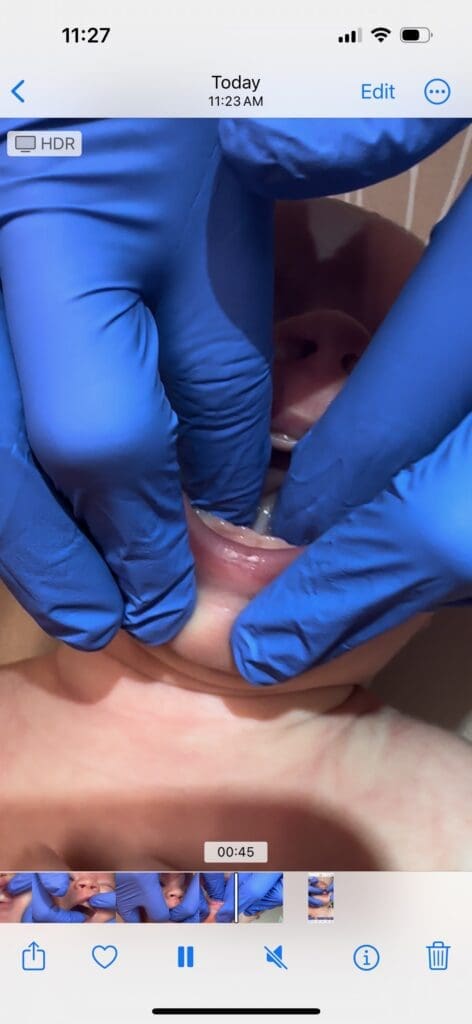
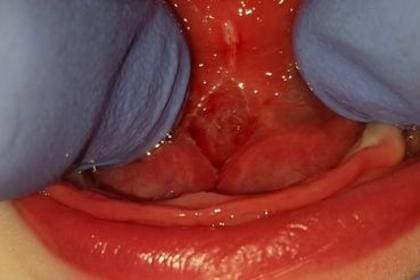
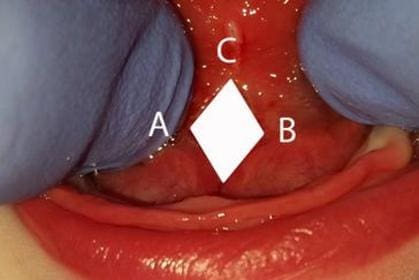
2. Tongue Lift (Diamond Stretch)
This was the hardest one by far.
You have to use two fingers to gently press down on the lower jaw and then lift the tongue up and back, holding it just long enough to expose the “diamond” shape of the healing tissue underneath.
This is the most prone to reattachment, so we were incredibly consistent with this stretch. We inititally weren’t doing it correctly, and in our follow up appointment a week later, was shown the the tongue actually needs to fold back in on itself.. it’s a deeeeeep stretch.
3. Cheek (Buccal) Stretches
These were the easiest. You place a finger between the cheek and gums and gently pull outward.
Our baby barely reacted to these, but they still mattered.
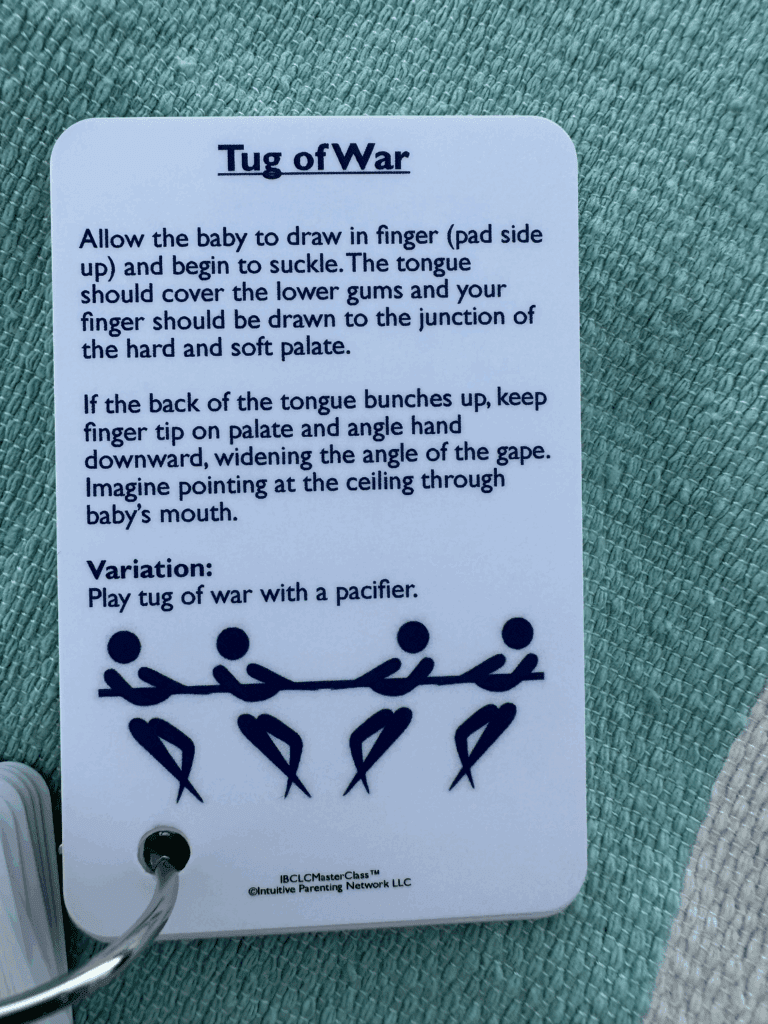
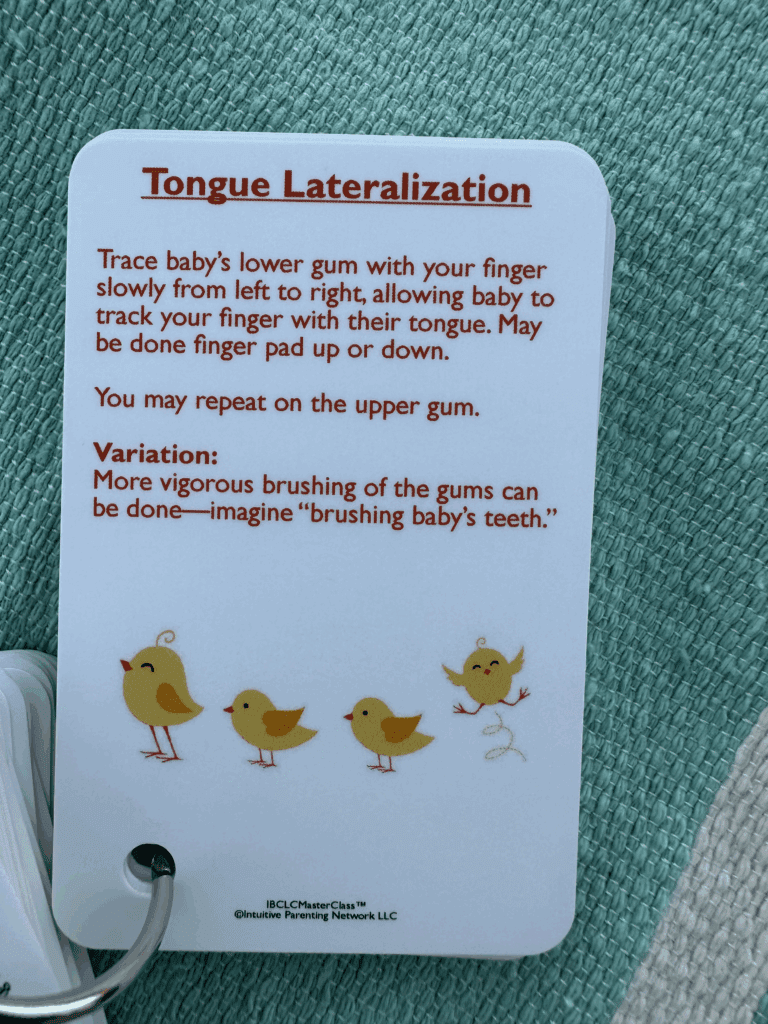
4. Seven Functional Movement Exercises
We were also given a set of functional movements to encourage proper muscle use. These were actually the same ones that were given to us to prepare our baby for the procedure from our LC.
IF YOU ARE CONSIDERING A FRENECTOMY, MY BIGGEST RECOMMENDATION IS TO START THESE ASAP.
Sucking Exercises:

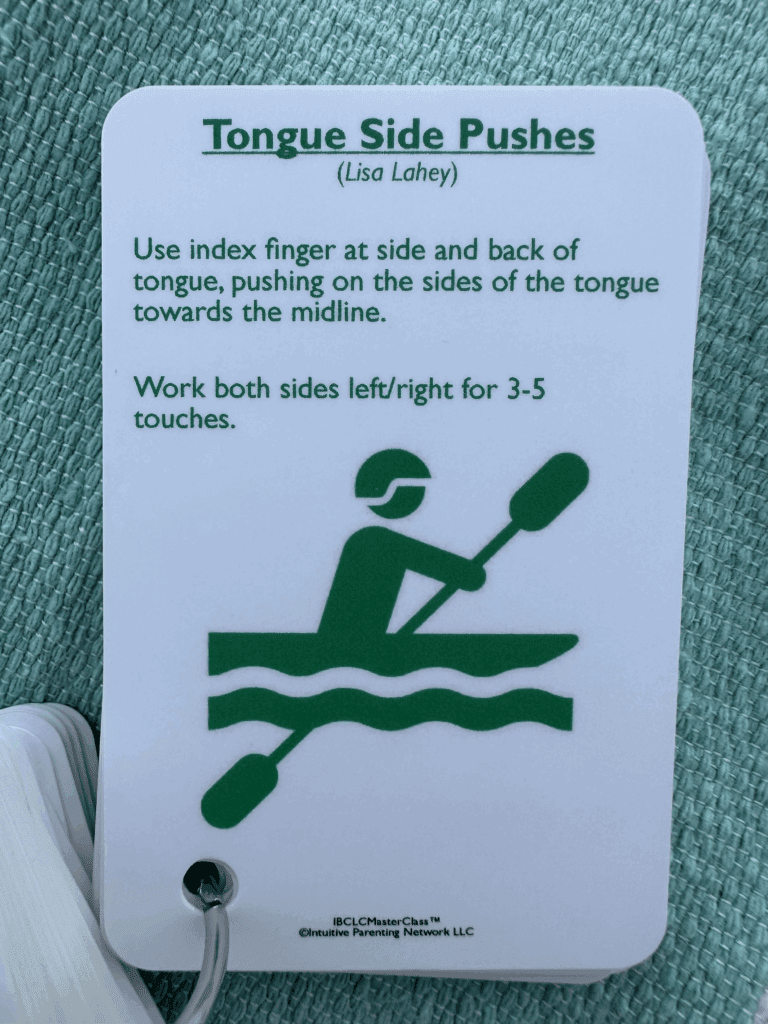
Side-To-Side Tongue Exercises:
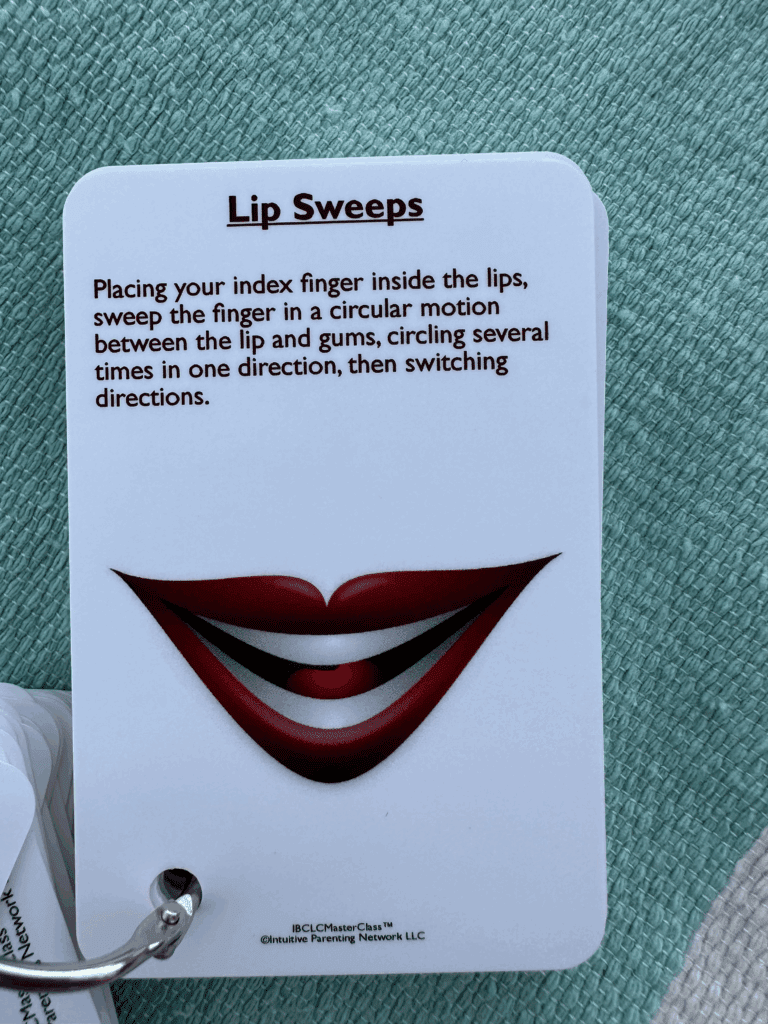
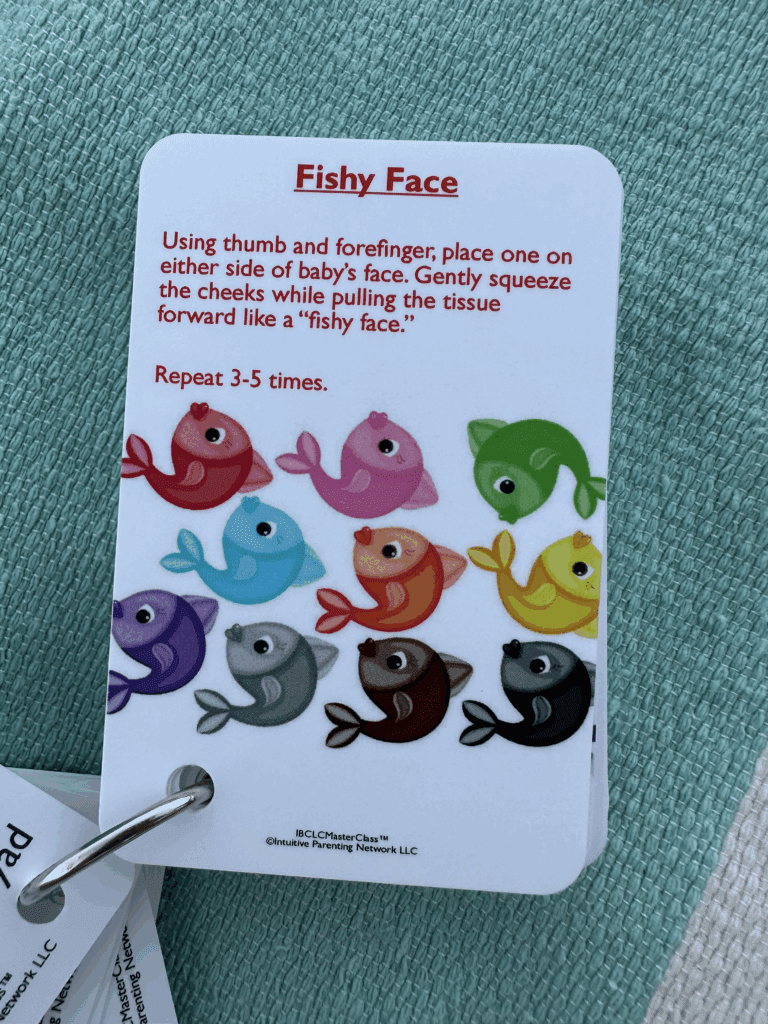
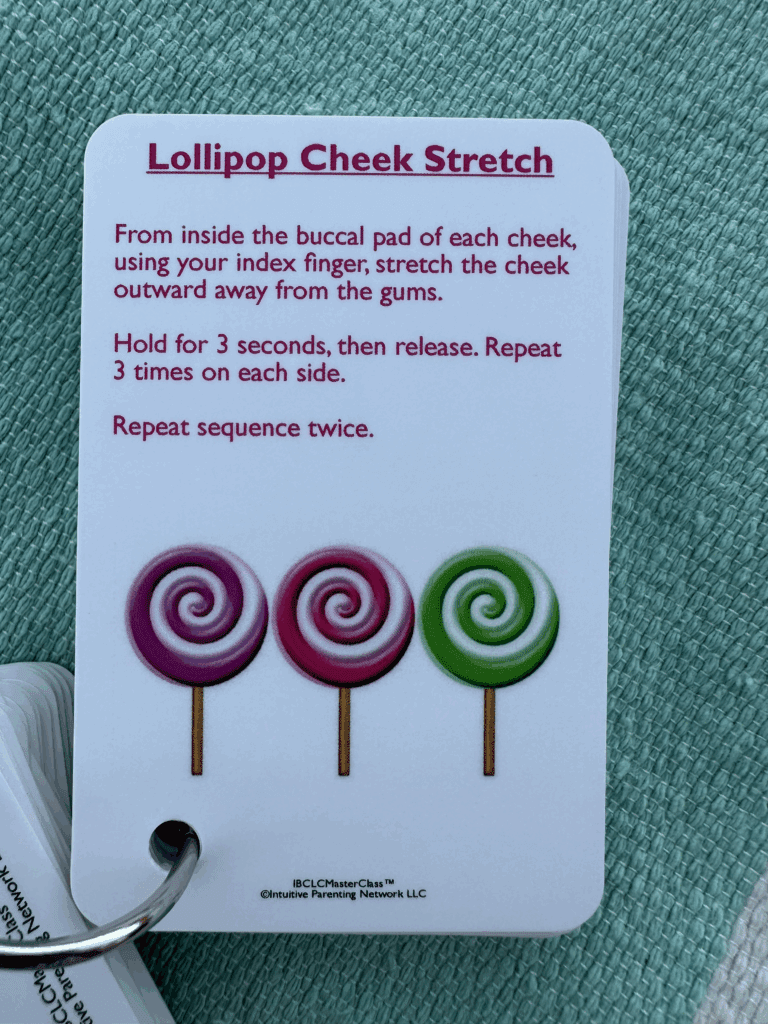
Other Exercises:
A Note on Timing
As with everything, there were differing of opinions in the frequency of stretches. We did stretches four times a day (every 4 hours) for the first week, then tapered as instructed by our provider.
We did 2 stretches in the middle of the night for the first few days, went down to once a night, and by the second week were stretching right before bed, and first thing in the morning.
It felt like a lot at first. But by week two, it became part of our rhythm and I’m confident it’s one of the biggest reasons the procedure worked as well as it did. We continued the stretches a couple times a day for a total of six weeks.
A Note on Equipment
Latex Gloves: We bought latex gloves from Costco and used those for every stretch. I had to be less particular about my hand cleanliness. I still washed my hands before, but didn’t feel the need to scrub under my nails before every stretch.
Headlamp: I would highly recommend a headlamp for these stretches. It’s really hard to see inside how far and what you’re stretching inside the mouth. We used the Nitecore NU30 500 Lumen. I liked this headlamp because there were different types of lights and brightness, one being an auxiliary red light, which was really nice in the middle of the night.
Infant Tylenol: We use the classic Infant’s Tylenol (dye free) that most parents have on hand. If you don’t, I highly recommend picking some up. You never know when you might need it.
Arnica: If you don’t want to give Tylenol and want a more natural pain reliever, Arnica was recommended. We opted for the Tylenol, but have used Arnica before and I do think it could be a good alternative if your baby isn’t in too much pain.
Would I Do It Again?
Without question.
I wish I had done it sooner.
Not because it fixed everything overnight (which it actually did), but because it gave me the chance to truly enjoy feeding, instead of gritting my teeth through it.
Final Thoughts
If you’re in the fog and you feel like something’s off, trust yourself. Keep asking questions. Get a second opinion. And don’t let one dismissive voice convince you that your experience isn’t real.
This decision changed everything for us and if you’re here reading this, I hope it gives you clarity, too.
Download: Does Your Baby Have an Oral Tie?
This checklist changed everything for us.
If you’re wondering whether a frenectomy might be right for your baby, start here.
➡️ [Download the PDF Symptoms Checklist]
Disclosure: This is a review blog which may get compensated for the products reviewed by the companies who produce them. All of the products are tested thoroughly and I only endorse products I believe in. I am an independent blogger and the reviews are done based on my own opinions.


View comments
+ Leave a comment